
My Everyday Sourdough Bread Recipe
By Amanda Paa – Updated August 12, 2026
Jump to Recipe
This post may contain affiliate links. Please read my disclosure policy.
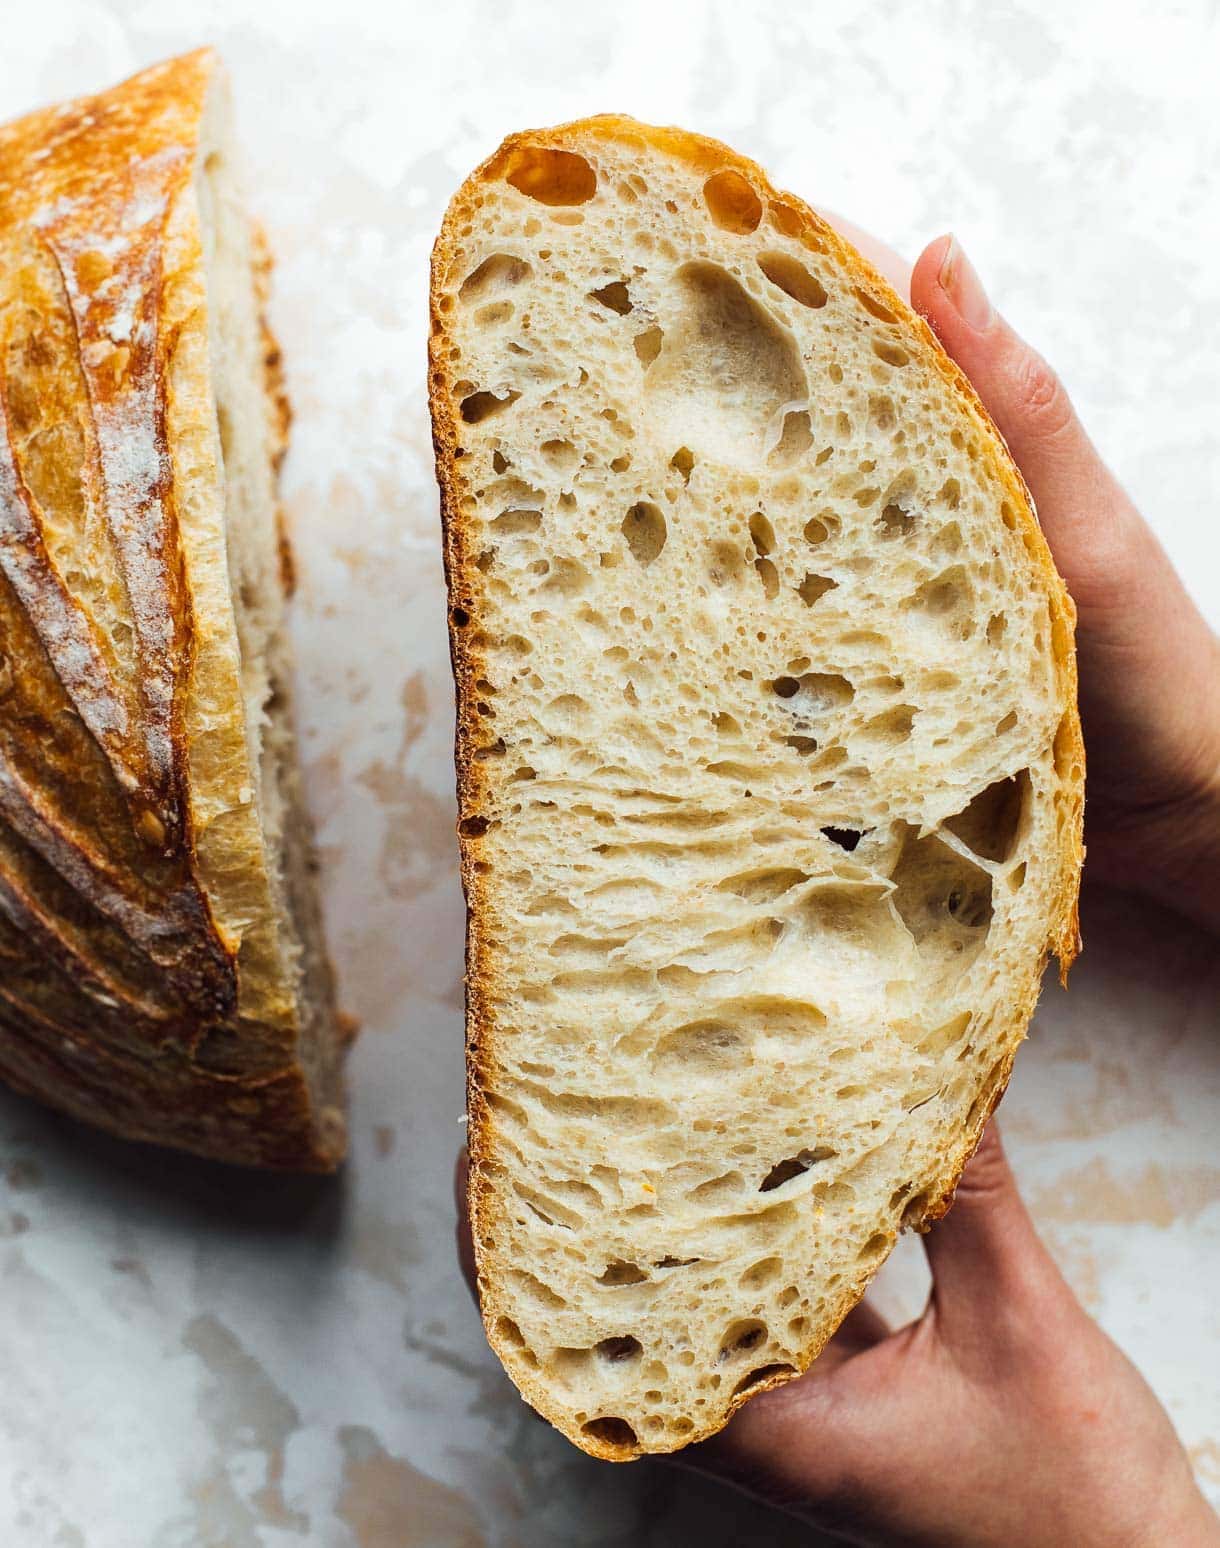
This straightforward sourdough bread recipe is a staple in our house. Made with sourdough starter, this naturally fermented bread has a fluffy, airy interior and crackly crisp crust. All the steps of making the bread are detailed out, as well as sourdough tips for beginners.

You know those recipes you know by heart and never have to look up? For me that’s this basic sourdough bread recipe with starter, the one I make every week, that’s completely achievable for beginners too. If you’ve been dreaming of fluffy, bouncy, true sourdough bread, you can make that happen in your own kitchen! I promise you.
Sourdough is all about learning by doing, and every time you get your hands in the dough, each step will make more sense.
I made my first sourdough loaf over 6 years ago, and I haven’t stopped baking. In this post, I’ll coach you through the basic steps and leave you with my favorite recipe. Then you can make your way to whole grain recipes, like my delicious rye sourdough and spelt sourdough recipes.
This basic sourdough recipe is made from mostly bread flour, with just a small amount of whole wheat or whole grain flour to give it some additional flavor and color. This amount is super versatile depending on what flours you have in your pantry. I like to use einkhorn, spelt, red fife, or khorasan.
First things first, you’re going to need an active sourdough starter. I suggest asking a friend who has lovingly fed and maintained their starter or purchasing mine so you can get baking right away instead of spending several weeks getting your started. You’ll be able to use to make sourdough english muffins, sourdough cinnamon rolls, and lots of sourdough discard recipes!
I ship my 13+ year old starter to anyone in the U.S! You can order it here.
While you’re getting started, this post with 5 Essential Sourdough Starter Tips for Beginners that I wrote may be helpful and this Sourdough Starter video. Both should answer many of your questions!
It’s essential for your starter to be healthy and active, so that is has the ability to make your dough rise. If your sourdough has been in the refrigerator, take it out 2 days before you plan to bake and begin feeding it again.
The biggest mistake I see beginner sourdough bakers make is:
Judging the end of proofing by time rather than how much the dough has risen. The problem with time is that every loaf you make, the temperature of your home and the temperature of your dough is going to be different, therefore it will rise at a different rate.
I highly, highly recommend getting a tall-sided bucket for your dough to rise in rather than a bowl because you’ll be able to accurately judge how much the dough has risen. With a bowl, the dough rises outward then up, rather than straight up. When I started using a bucket for the bulk fermentation, my finished loaves improved dramatically.
Your dough is finished rising on the countertop, the end of bulk fermentation when:
- the dough has risen to just short of doubling
- it has one or two bigger bubbles poking up around the edges of the dough
- the top surface is every so slightly domed rather than flat
- the dough has small tiny bubbles throughout it
- the dough looks alive
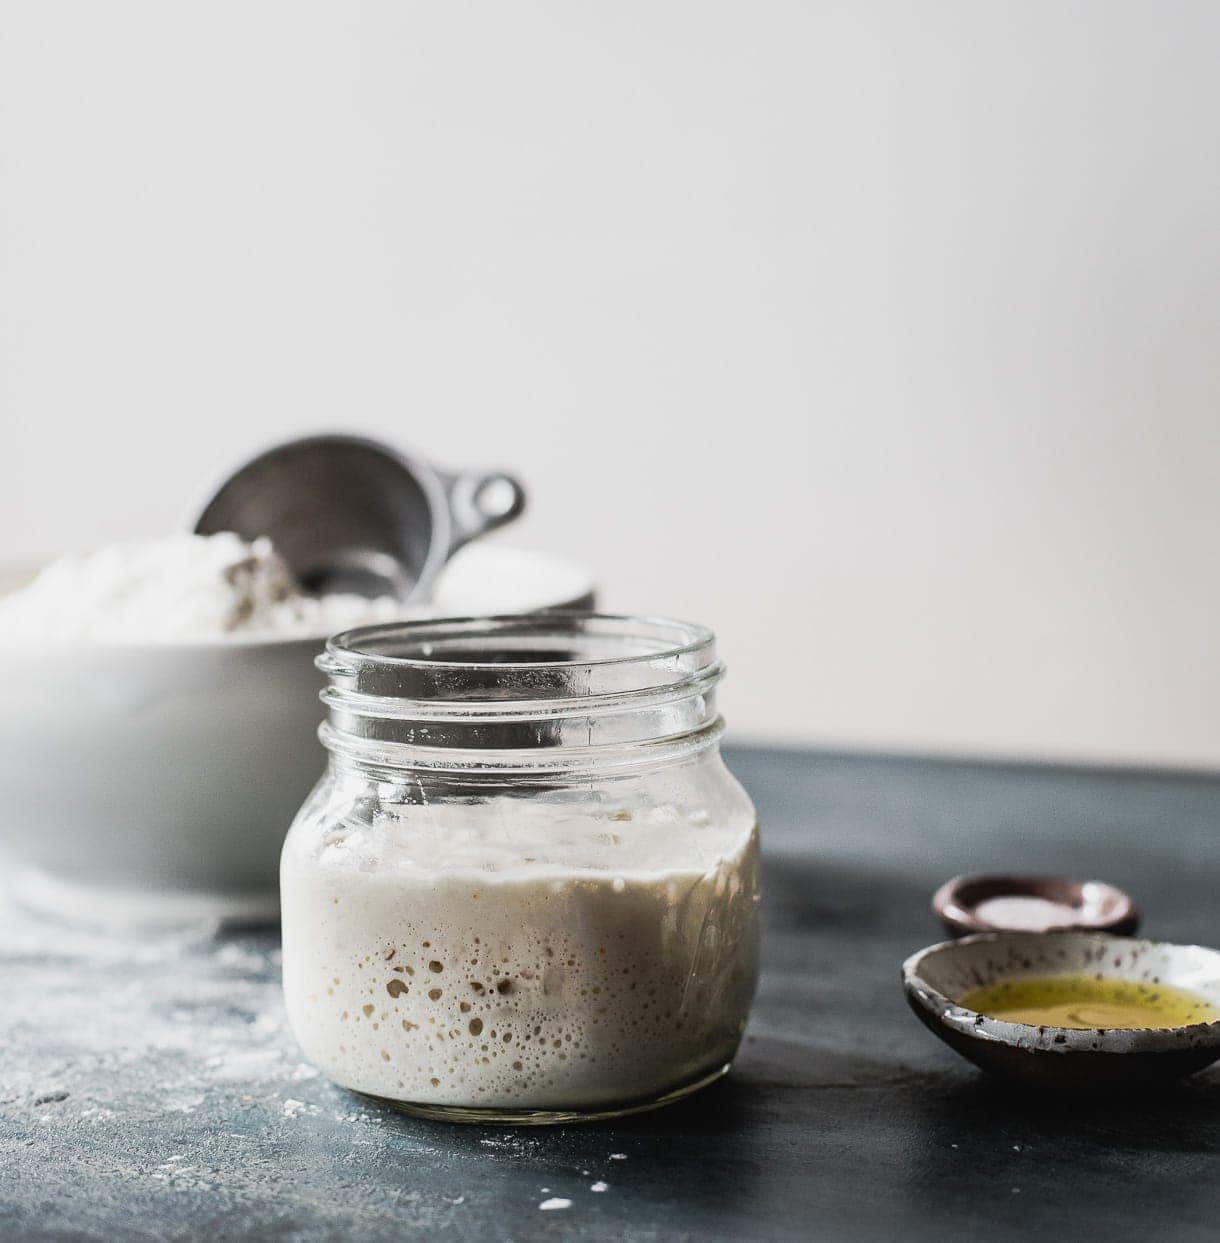
How do I know when my sourdough starter is ready to bake with?
The answer to this question comes from both experience and observing the starter behave, to understand how it reacts to feeding/not feeding, and temperature.
You can just look for these hints that the starter will give you!
a. It will have at least doubled in size. This will take place over 6 hours if the temperature in your house is around 72 degrees. If it’s cooler in your house, it will take a bit longer. I put a rubberband around the jar, to mark the spot it’s at right after feeding. Then, as time passes, you’ll be able to keep track of how much it’s rising.
b. You will see bubbles throughout the sides of the jar, and on top. The top will be a bit poofy and domed. When you stir it with a spoon, it will feel like roasted marshmallows. And sound like it too!
With the final rise on the counter, how do I know when my dough has risen properly and can be scored and into the oven for baking?
There’s an easy test for this stage too, using a fingerprint. Gently press a floured thumb into your risen dough. You don’t need to press down further than 3/4 inch.
If it indents and gradually releases, but still holds a finger shape, you’re ready. If your fingerprint jumps right back up to flat, it needs more time to rise. If your fingerprint indents and doesn’t bounce back at, it is overproofed. That’s okay, just get it in the oven! It will still taste delicious, it will just not rise as well while baking
Once your sourdough starter is ready to bake with, here you’re ready for baking. You can watch this step-by step tutorial of me making this sourdough bread recipe to help you as well.
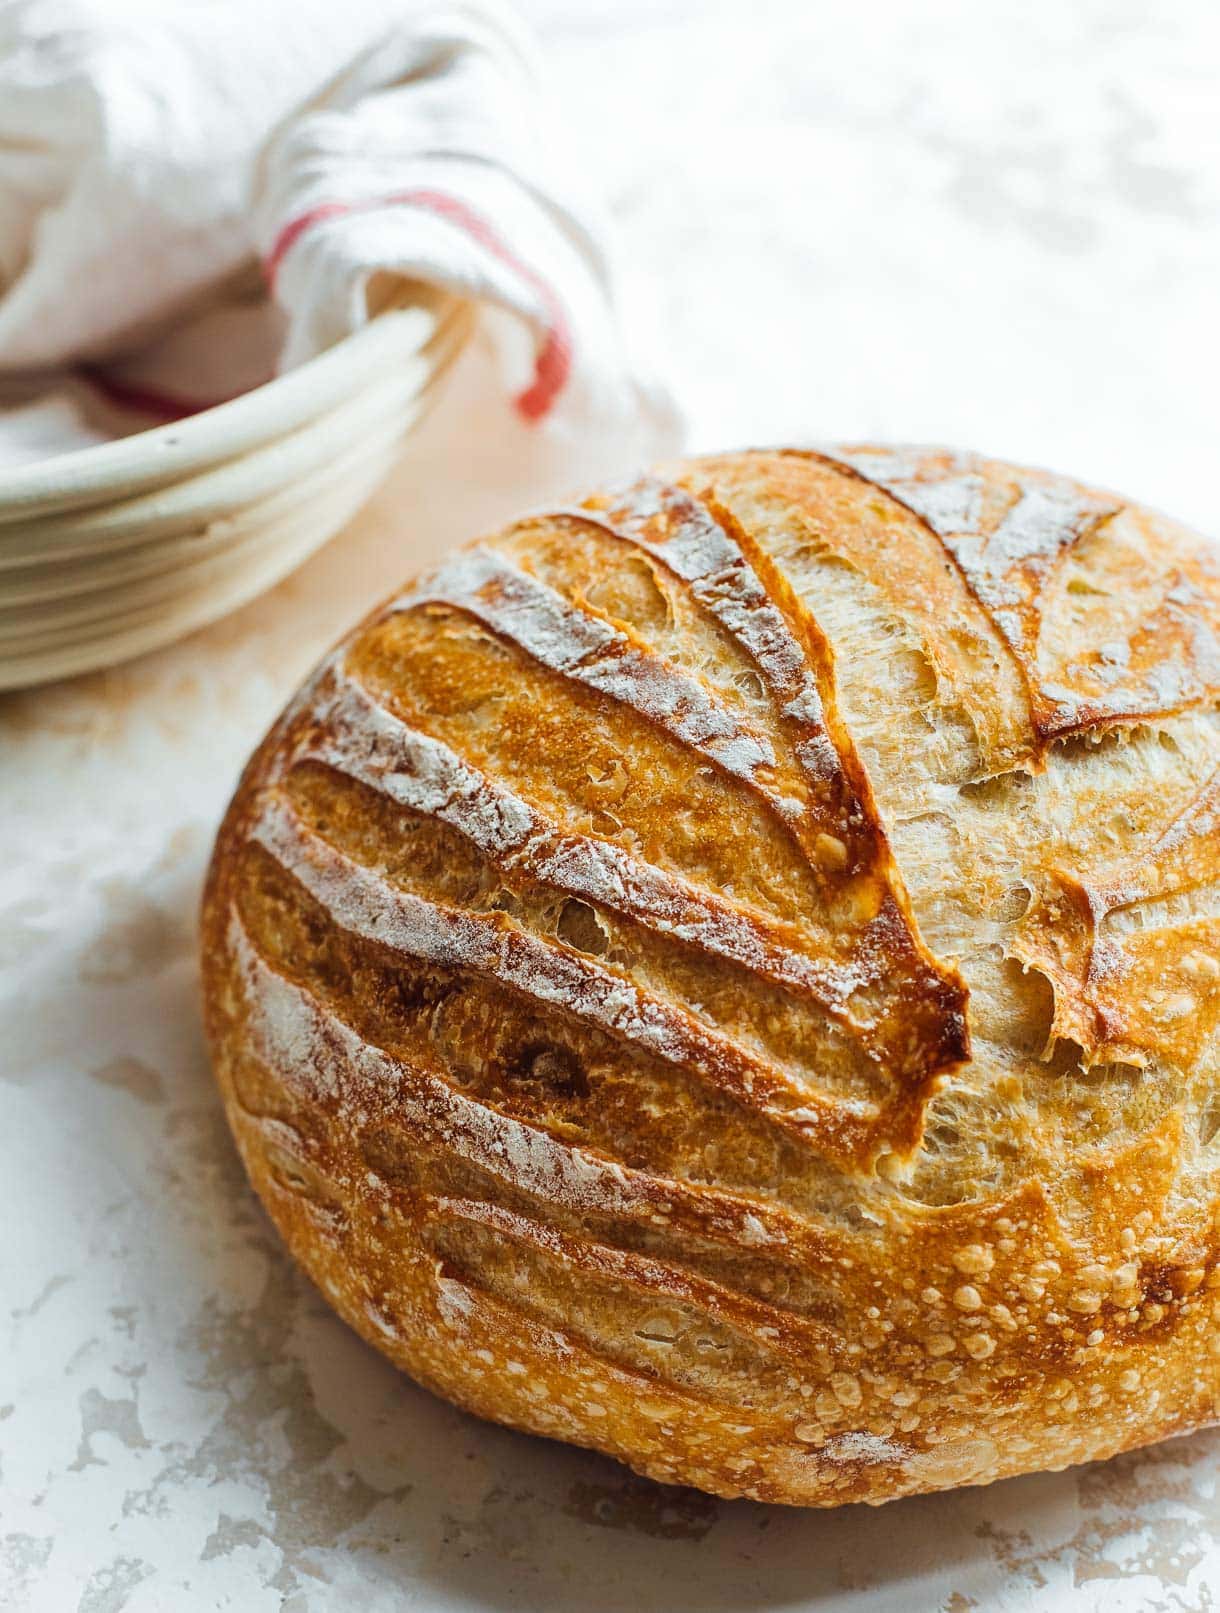
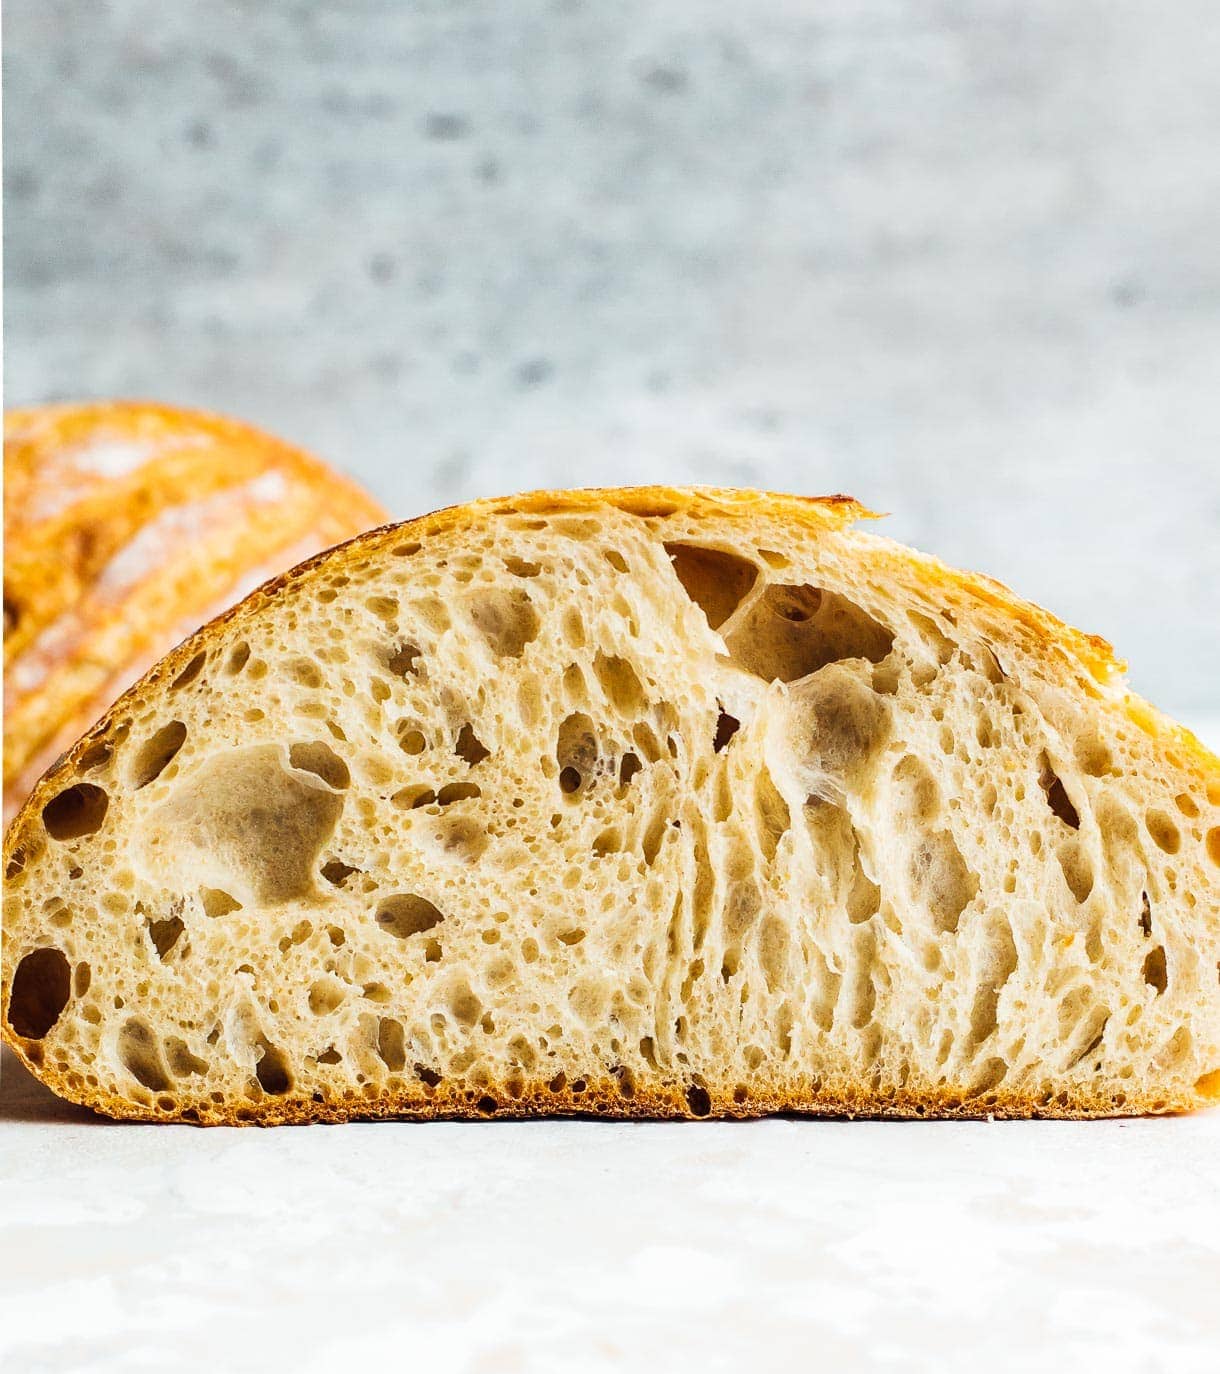
This recipe is an adaptation from many recipes and techniques I’ve tried, starting first with Artisan Sourdough Made Simple, The Perfect Loaf, then Tartine, Bake With Jack, and the list goes on. You’ll find what works best for you over time, as well.
And the beauty of sourdough is that no bake with ever be exactly the same as the last, because you’re working with an amazing living culture!
Feel free to ask me any questions you might have, or reference some of my other sourdough resources:
- Sourdough Videos
- Top 10 Sourdough Starter Tips
- Honey Walnut Sourdough Bread
- Whole Wheat Sourdough Bread
- Jalapeno Cheddar Sourdough Bread
Yield: 1 loaf
Equipment
Ingredients
- 50 grams active sourdough starter
- 305 grams filtered water at temperature, around 85 to 90 degrees F
- 370 grams bread flour
- 30 grams whole wheat flour*
- 7 grams fine sea salt
Instructions
- In a large bowl, mix starter and water with a fork, until starter is dispersed. Add flours, mixing with a spatula first. Then with your hand until a shaggy dough is formed, just enough so that flour is not visible.
- Cover with a damp cloth and let sit for 30 minutes.
- Once rested, add salt to top of dough and liberally knead the dough for two minutes. Then perform your 1st of stretch and folds. Let rest for 30 minutes.
- Then perform your 2nd set. Let rest for 30 minutes. Then perform your 3rd set. Let rest for 30 minutes. Then perform your 4th and final set. Here is a video of how to do a stretch and fold. It is easy!
- After those stretch and folds are completed, you will let the dough go through its long proof (rise) in a bowl or my preferred vessel, a tall sided bucket so I can tell how much the volume is increasing. on the counter – this stage also known as the bulk fermentation. You are looking for your dough to be finished proofing when: it has until just about doubled in size, like a 85 to 95% increase, has a glossy look to the top, is slightly domed on top, and a bubble or two will be poking out the edges of the time. It should jiggle a bit as well when you shake it. These are the signs to look for, rather than going off of time. A specific length of proofing time cannot be given because the temperature of water you used and air temperature in your home will be different for everyone, and will also be different for you every time you bake. If your house is between 72 to 76 degrees F, that is ideal for the wild yeast to be happy and the double will rise quicker than if it cooler in your home. That means sometimes it might take 6 hours to finish proofing, maybe in summer, and over 10 hours in the depths of winter.
- After the bulk fermentation is finished, you'll gently move the dough out of the bowl onto a floured work surface. Let the dough rest there for 10-15 minutes.
- Then, shape the dough. You can watch the video below to learn how to shape it into a round boule.
- Once shaped, use a bench scraper to put the dough into a banneton (proofing basket) that has been liberally dusted with rice flour, seam side of the dough facing up (so the top of the dough is what is touching the bottom of banneton) when it is placed in banneton.
- For best results, I like to do a cold final proof in the refrigerator, overnight. Put the banneton with dough, in a plastic bag or covered with a shower cap (this ensures the dough will not dry out) in the refrigerator and let the final rise happen. You can bake ANYTIME the next day. OR you can do the final proof on the counter, covering with a damp cloth. You are looking for about a 15% rise in the dough, and or it to puffy on top. This is typically between 1 to 2 hours, depending on the warmth of your home.
- Once your dough is finished proofing, preheat your oven with dutch oven in it to 450 degrees F. (Keep the dough in the refrigerator if you did the overnight rise, until is preheated. Cold dough is much easier to score than warm dough, and you also don't want to let it proof more at room temperature.)
- Wait until oven is preheated, then place parchment over the top of your banneton with dough in it and flip over, so that the seam side is now on the parchment paper and you are able to score the top of the dough.
- Score the dough with a bread lame, making sure to go at least 1/2 inch deep in a few spots so that dough can release gases. Otherwise your bread will not rise.
- Place dough on parchment paper into a dutch oven, and put cover on it. Bake for 20 minutes, covered at 450 degrees F. Then remove cover, turn heat down to 425 degrees F, and bake for 25 more minutes, until bread is golden brown and crackly.
- Remove from oven and place load on a cooling rack. Let cool for AT LEAST ONE HOUR before slicing. Otherwise the crumb will be squished and the texture will be gummy.
Notes
*You can also use whole grain einkorn, spelt, red fife, or khorasan flour.
Did you make this?
tag @heartbeetkitchen on instagram and hashtag it #heartbeetkitchen
April 8, 2020

Brianne
February 17, 2022
You have helped & encouraged me a number of times over the past couple years! Thank you for sharing your wealth of knowledge and opening your {beautiful!} home for us to learn!
Amanda Paa
February 17, 2022
You’re welcome, Brianne! So glad you are enjoying sourdough baking!
Katie
February 15, 2022
Thank you for this foolproof recipe! I wanted to start adding other ingredients in like pink peppercorns, what stage would you start folding stuff in?
Amanda Paa
February 15, 2022
So glad you enjoy this recipe, Katie! If you wanted to add dry spices, I like to do so in the 2nd set of stretch and folds.
For larger ingredients that have moisture, this Jalapeno Cheddar Sourdough would be a good guide and insight.
Priscilla
February 9, 2022
Delicious!! The instructions are easy to follow because well explained and the videos are so helpful!! Will be making again and again!
Amanda Paa
February 10, 2022
so glad you are on the sourdough journey, Priscilla!
Kim
February 1, 2022
I’m on my fifth bake of this recipe. I have watched a couple of your videos over and over and I’m getting the hang of it! Your videos were SO helpful and you just were a fun teacher! Thanks so much!
Amanda Paa
February 2, 2022
Yay, glad you are enjoying the sourdough journey!
Nina
January 18, 2022
Hi! When making the initial shaggy dough, how wet should it be? I followed your measurements but my dough seems very sticky. Just wondering if we are supposed to add more flour to get to a certain consistency. I think as it goes through stretch and fold, the dough becomes more pliable but just looking for overall guidance on what the initial dough should look like. Do you have a video showing that initial shag?
Amanda Paa
January 18, 2022
Hi! Don’t add more water, it should be wet. As you do each set of stretch and folds, it will get tackier and smoother, and less sticky. Here is a video of the initial mixing of sourdough.
Erin O.
January 17, 2022
This was a great recipe for me as a beginner! I’m so happy with how it turned out. Highly suggest her starter as well! Thanks!
Amanda Paa
January 17, 2022
so glad you are starting your sourdough journey with success!
Amy
January 15, 2022
Hi Amanda,
Can’t wait to try this recipe looks delicious and your videos are so helpful, but what size Dutch oven, 6 quart?
Thank you
Amanda Paa
January 15, 2022
Hi Amy! It’s a 5.5 quart.
Doug Ramsfiekd
January 14, 2022
Your recipes are great. I enjoy your writing and your obvious energy. Very clear and precise instructions that really are helpful. Thank you!
Amanda
December 14, 2021
Help why is my bread sticking to my banneton?
Amanda Paa
August 29, 2022
Mercury Mosaics!
Abigail
December 14, 2021
Hello! I’m excited, I plan on baking this recipe later this week! Quick question though: it says 45g active starter. At what point should I use the starter, at its peak? I know other recipes have leaven they do but I’m trying to plan out the timing for this loaf so I can put it in the fridge for the night on Thursday night. I have a proofer so if counter rising it will always be at 75 degrees Fahrenheit so I assume the whole process will go quicker. It takes about 6 hours for my starter to get to its highest point but it definitely doubles before then. I’m so excited to try this bread!!
Amanda Paa
December 14, 2021
yes, you should use the starter to mix the dough when its at its peak!
Sarah
October 31, 2021
What do you suggest is the best way of storing or gifting a loaf while keeping the crusty crispy & crackly?! Thanks for the help!
Amanda Paa
October 31, 2021
Hi Sarah! I store the uncut bread with a linen draped over the top, not tightly, until I’m ready to gift it. The day I am going to gift it, I gift wrap the sourdough bread using this method with parchment and twine, adornments, to gift wrap the bread!
MariaCristina
September 19, 2021
Amanda! Thank you for this awesome recipe! I am new with sourdough, but watching you Instagram and YouTube channel is imposible not to wanted to try! The recipe is so easy to follow, and precise. Amanda give you all kinds of tips to reach success, and she has such a nice personality that is adorable to listen to her. I did my first loaf of sourdough and it was just delicious, with nice texture and the taste was divine! If you are looking for a sourdough recipe here is the one !! If you are looking for a dough starter she ships worldwide!
Amanda Paa
September 19, 2021
Yay, thank you for your kind words and I’m so glad you are on your way to baking delicious sourdough! Love hearing that your first loaf was successful.
Jeremiah
September 19, 2021
I use 1 tsp diastolic malt powder to give it a strong rise and adds nice brown crust
Cherie Pilkington
September 6, 2021
I love the basic sourdough. Been makings it weekly. I’m having issues with the loaf spreading too much during baking. What am I doing wrong?
Amanda Paa
September 7, 2021
Hi Cherie! Is it warm in your area? It could be that the higher summer temperatures have you overproofing the loaf a bit, which would cause the spreading.
Maureen
September 1, 2021
I am unable to find the other recipes. Please help.
Amanda Paa
September 2, 2021
hello! which recipes are you trying to find? i can help.
Sam
August 25, 2021
After years of trials, this sourdough advice was the best and I achieved the perfect loaf!
Anya
August 2, 2021
Amazing! It came out picture perfect and absolutely delicious.
Jan
July 18, 2021
As a beginner I am enjoying your 5 Minute Sourdough School! Do you use a whole wheat starter or white starter when making your Everyday Sourdough Bread Recipe? Or does it matter?
Thanks so much
Amanda Paa
July 18, 2021
Hi Jan! I use my 100% all purpose flour starter when making that recipe. But either would work!
Barry Kirk
July 5, 2021
Simple and easy recipe to follow, with great results. Really appreciated all the links to additional helpful content within the recipe, too. As a beginner, I plan on using this as my go-to recipe to keep practicing my technique.
kate
June 30, 2021
This recipe is indeed delicious and I now make it every week too! There are so many overly technical/science-y sourdough recipes out there that can be quite overwhelming. On the other hand there are a lot of very beautiful looking recipes that disappointingly turn out to be style over substance. I was delighted to find Amanda’s recipes, which are a perfect balance of all these elements.
I maintain a rye starter and so use rye flour for the wholewheat component of this recipe. I also double the ingredients to make two loaves at a time, bulk fermenting in the fridge overnight and dividing at bench rest stage, which works well.
If you haven’t already, be sure to watch Amanda’s linked video for shaping guidance. My loaves turned out well just by following the recipe but have greatly improved after taking the time to watch that. It also feels delightfully like being in the kitchen with a friend.
Amanda Paa
July 1, 2021
this comment made my day, Kate! thank you so much for sharing these words, and i absolutely love hearing about your sourdough journey. i now want to try a rye starter, too. :)
Gabbie
June 29, 2021
This is my new go-to sourdough recipe! It came out with a great crust and bubbles. Super happy with this loaf!
Amanda Paa
June 30, 2021
yay, so glad you’ve found a keeper of a recipe!
Beverly Movius
March 25, 2021
Hello! My dough rises fine, but when I put it on the board to rest before shaping, it is just kind of a blob, and spreads out, it doesn’t hold a nice shape like yours in your video. And it’s super sticky. I have to keep putting flour on the board as I shape it. What am I doing wrong? Is it too hydrated? Over proofed? This has happened many times. When I bake it it does fine. Maybe not as round and tall as yours but still
A good loaf. Thank you!
Amanda Paa
March 26, 2021
Hi Beverly! If your dough spreads a lot after your bulk fermentation and is very sticky, it’s likely overproofed.
Knowing when the dough is properly proofed is the most challenging part when you begin baking sourdough. But you’ll get there, just keep baking!
Bethany Campbell
March 11, 2021
Hi. If I double the recipe to make a larger loaf, how much do I add to the baking time?
Amanda Paa
March 11, 2021
Hi Bethany! I would not suggest doubling to make one larger loaf. If you double, you should divide into two loaves while shaping. You will not be able to handle the dough as one large mass, and it will not bake through.
Maria
April 22, 2021
I doubled the recipe and doubled the covered bake time. Larger loaf turned out perfectly!
Maria
April 22, 2021
I doubled this recipe and doubled the covered baking time. My larger load turned out perfectly!
Amanda
February 9, 2021
I bought your starter back in December and have been testing out various bread recipes since then, but I have to say I keep coming back to your Everyday Sourdough bread recipe because it’s just perfect! Thanks for including the videos and explanations around the stages of bread making. I can’t say we’ve nailed it 100% of the time, but each loaf has been so tasty and fun to build off of. Thanks for your dedication to helping us all!
Amanda Paa
February 10, 2021
yay, that’s so good to hear! love to hear that you have baked many loaves! and the beauty of the learning process is that not every bake will be perfect, but you get better each time. i’m still learning and i’m over 3 years in to baking sourdough!
Goldie
February 8, 2021
Amanda:
I baked another loaf today after trying out a few other recipes/formulas for sourdough, but i just keep coming back to this one. It’s so consistent. It’s such an easy recipe to follow. I love it!
Amanda Paa
February 9, 2021
yay! that’s so great to hear. so glad it works well for you. send me a pic of your loaf next time!
Bridgette James
February 7, 2021
Hello!
First of all, I absolutely love your sourdough bread recipe! I haven’t even bothered trying other recipes because this one is perfection! However, I just moved and consequently have a different oven. I’m worried about baking times because I know that ovens can have slight variances. Have you ever measured the internal temperature of your loaves? If so, what temperature would you suggest as a guideline?
Warmly,
Bridgette
Amanda Paa
February 8, 2021
hi bridgette! i know oven’s can be a bit fussy when you’re adjusting to one that you haven’t baked in for an extended period of time.
you can measure the internal temp of the bread, which should be around 205 degrees F when done. i’d also recommend getting an inexpensive oven thermometer.
Jane
January 30, 2021
Hello Amanda,
I have been baking with your sourdough starter for approximately two weeks and overall it is going well. I am currently working on timing so as to have a loaf ready at dinnertime. Could I feed the starter before bed or would it be too many hours from peaking until morning?
Thank you,
Jane
Amanda Paa
January 31, 2021
Hi Jane! If you want to feed the starter the right before, you should feed it a higher amount of flour/water compared to the amount you left in your jar. A smaller ratio of starter in the jar, prior to feeding will give you a slower rise. Especially if your house gets cooler at night, which will also help it rise slowly and be ready for you in the morning.
Elena
January 20, 2021
Hi.. How long should I let the dough hang out on the counter after retarding in the fridge? Does the temperature of the dough matter before it goes in the oven?
Amanda Paa
January 21, 2021
hello! you should take the dough out of the fridge once your oven is preheated, then score and bake. it should not hang out on counter after the final rise in fridge.
Frannie
January 8, 2021
I want to confirm that your sourdough starter and recipe works with gluten free flour, and, if so, your recommendation for gluten free flour. While I am not celiac, I do need to stay gluten free. Thank you.
Amanda Paa
January 12, 2021
Hello! My sourdough starter is not gluten-free, and the recipes are made with regular flour.
Kelly
December 3, 2020
HI, I found your site after listening to you on Best to the Nest. I need a hobby for the winter and sourdough baking sounds like a fun project. I picked up my starter from a friend this week. Now as I start reading more about sourdough starters and baking, I understand why Elizabeth said she has watched your videos multiple times! My question for you as I gather supplies is what size dutch oven do you use? I might try baking in a covered casserole dish (knowing my results won’t be as good) while I have time to research needed supplies.
Thanks for your videos and instructions!
Amanda Paa
December 4, 2020
Hi Kelly! Happy to have you here and so great that you acquired a starter! I use a 5 quart dutch oven. This post has a lot of my favorite tools and links to them.
Kelly
December 7, 2020
Thank you! and Yeah! my 1st loaf turned out and was tasty. Not without some error along the way but it turned out good. Looking forward to baking more and more. I like your smaller loaf measurements and easy to follow instructions.
Caroline Sanchez
November 12, 2020
Hello! I was wondering why you need the 30g of other flour? Does it change the texture? Will i be okay just using bread flour? Hoping to make this loaf tomorrow, very excited!
Amanda Paa
November 12, 2020
hi Caroline! i like the bit of flavor depth the whole wheat gives the loaf. you can make it with all bread flour if you’d like.
Angela Yeung
September 27, 2020
Hi again..
I am about 2 hours in my bulk fermentation at around 78 degrees. My dough is not keeping its shape. What went wrong? :(
Betty Nesmith
August 25, 2020
I was so excited after watching your videos. Had finally found help with my adventure in making sour dough bread. Ordered a bread bowl, knife and scales. You have your recipe in grams so I chose the g on the scales and the measurement could not be possible. I zeroed out the container for measuring the flour but a small amount of flour was a high count under g, Could you possibly put your gram measurement in ounces? I am disappointed. I finally have my starter looking good and ready to bake but I need help.
Thank you.
Amanda Paa
August 25, 2020
Hi Betty! You can convert grams to ounces, here: https://www.rapidtables.com/convert/weight/gram-to-ounce.html
Katrina
August 3, 2020
Are there any problems with doubling this recipe and splitting in two loaves for the final rise?
Amanda Paa
August 3, 2020
You can definitely double! Results are great, too.
Katrina Waddy
August 3, 2020
Thank you for the quick reply!
Melissa
July 22, 2020
1st off. I love this recipe. I made 3 loaves. I did a regular, added jalapeno & cheddar to the 2nd & folded apple pie filling to the 3rd. Major hits with the family. I gave my cousin some starter & shared your YouTube & website with her…. Anyway, I’m wondering if you have any tips about turning this into a loaf for sandwich slices?
Amanda Paa
July 23, 2020
Hi Melissa! I’m so glad you like this recipe! And those mix-ins sound wonderful. You’d probably want to google a specific recipe for sourdough sandwich bread, and those are typically lower in hydration and are made with different ratios that this recipe.
Geri Patton
July 18, 2020
I finally got a good load with your receipe! Thank you! Have another started since I know we’ll need it in a couple days. Can you do both bulk proof and final proof in the fridge? If not, how long can I leave bulk proof in fridge before I shape it? also, I tried putting in a cloth lined bowl to proof, I did flour cloth but the dough really stuck! Any suggestions since I don’t have a bannaton? Thanks again. Your videos were really helpful
Amanda Paa
July 19, 2020
Hi Geri! So glad you liked the recipe.
If you do the bulk proof in the refrigerator, you’ll have to watch it to know when it’s finished with the bulk. It will also need to come to room temp before shaping.
Since refrigerators and water temperature that you’re using in the dough will differ, it’s hard to put a time frame on it. Best way is to watch the dough for the indication signs.
If you do not have a banneton, try liberally dusting a linen with rice flour.
Geri Patton
July 19, 2020
Can I final proof in fridge again after shaping?? Thanks
Amanda Paa
July 20, 2020
Yes, you certainly can!
Isabel Kelly
July 17, 2020
Hi Amanda! Just getting started with sourdough baking and your tutorials are super helpful. I have made two loaves and have turned out delicious! I have a question about the final step.
I am doing my final rise in the fridge overnight. and I am confused as to how to go about baking it.
Do I take the dough straight out of the fridge and put it into a cold dutch oven?
Do I take the dough straight out of the fridge and put it into a preheated dutch oven?
Do I let the dough get to room temperature before putting it into a dutch oven for baking?
Thank you so much!!
Amanda Paa
July 17, 2020
Hi Isabel!
Once your oven is preheated, you will take your dough out of fridge, score, and bake. You can preheat the dutch oven if you want, and you’ll get a tiny bit more rise, but if you don’t have time, it will still work extremely well baking in a cold dutch oven too.
Clarissa
July 10, 2020
Beautiful yummy looking sourdough, I will try this, thank you for your time and recipe! What a beautiful stove, what kind is it, please?
Amanda Paa
July 10, 2020
Hello! We have a Blue Star range, and love it.
Khairiyah
May 28, 2020
i overproofed my first loaf. was a mess! did not give up and tried again and cut short the proofing to only 2 hours after 2 hours of stretch and fold and it turned out amazing! im from Singapore, very sunny and humid so maybe that explains how 6 hours did not work for me. thank you for the recipe! easy to follow. did not have to change anything else.
Brittany
May 18, 2020
Hi! I’m working on learning sourdough craft but I feel like my dough is usually pretty sticky when it comes time to shape my loaf. Any suggestions?
Amanda Paa
May 18, 2020
Hi Brittany! Sourdough is stickier in general compared to baking bread using commercial yeast. But if you’re find your dough too sticky to work with, that means you are having a proofing issue. Typically it is a sign of overproofing.
Beth
May 13, 2020
Hi – your sourdough recipe has yielded my best results for bread baking! I’m having issues shaping my dough after the bulk ferment. It is glossy and bubbly but when I shape it in ends up kind of deflating instead of holding a firmer shape. The dough feels very wet when shaping. Any tips on how to get my loaf to hold it’s shape better? Thanks!
Amanda Paa
May 18, 2020
Hi Beth! Sourdough is stickier in general compared to baking bread using commercial yeast. The dough should feel somewhat tacky and wet, but still workable. You also say that your dough is deflating. Both these signs are indicators that you are overproofing.
Cindy
May 1, 2020
Amanda- how do you store your bread? Thanks!
Amanda Paa
May 2, 2020
Hi Cindy!
The day I cut the bread, I keep it stored cut side down with a linen covering it. This keeps the crust crisp.Then if there’s still bread the next day, I move it to a plastic bag.
Cassie
April 28, 2020
Hi Amanda!
I have a question about letting it ferment in the fridge. In the post it talks about doing the bulk ferment in the fridge after you do your 2 hours of stretch and fold. In the actual recipe though it talks about putting it in the fridge overnight for the final rise. If I do my bulk ferment in the fridge over night do I need to do any additional steps before shaping the dough? Do I need to bring it back to room temp before I try to work with it?
Thanks for the help!
Amanda Paa
April 28, 2020
Hi Cassie!
Yes, in the post I discuss a bulk ferment in the refrigerator. You can also do the final rise in the refrigerator overnight, which is how the recipe card reads because bulk ferment on the counter, final rise overnight in refrigerator is how I like to time things. But you can do either!
If you do the bulk ferment overnight, take it out in the morning and let it sit on the counter for an hour to warm up. Then assess the dough to see if it is doubled and glossy, and bubbly. If it is, proceed to shaping, etc.. If not, you’ll need a little longer on the bulk ferment.
Cassie
April 28, 2020
Great! Thank you for the information, I’m glad to know it can be done both ways. I’m excited to see how it turns out!
Lise
April 24, 2020
Hi! Do I have to preheat the Dutch oven? Rather new to this style of bread and my last recipe for seedy spelt with yeast had to go in a preheated Dutch oven. Thank you!
Amanda Paa
April 24, 2020
Hi Lise!
You do not have to preheat the dutch oven. I’ve found no difference in oven spring when testing both ways.
Jane
April 22, 2020
Hello, if so split the recipe and make 2 smaller loaves (I don’t have a large Dutch oven but do have 2 smaller ones) is the baking time the same, do you think? I’m going to bake them tonight. They are right now in the fridge for the final rise. Thanks!
Amanda Paa
April 22, 2020
Hi Jane!
You’ll want to reduce the baking time, I’d say 20 minutes covered still, but maybe check at 20 minutes uncovered. You’ll want internal temp of the sourdough to be 208 degrees F.
Sheri Nix
April 16, 2020
Hi Amanda, I’m making this sourdough bread recipe today with my homemade starter! I’ll let you know when it’s done!
Amanda Paa
April 16, 2020
yay, hope you love it!
Emily
April 15, 2020
Can we use all purpose flour if we don’t have bread flour? Thanks for all the detail, super helpful!
Denver New Baker
April 14, 2020
For those of us who don’t have a kitchen scale, can you approximate amounts in cups? Thank you!
Amanda Paa
April 15, 2020
Hi Nannie! You’ll need a kitchen scale for making sourdough bread. Grams are the standard measurement across these these types of recipes so that your baking percentages are accurate. I highly recommend this scale, which is a good price and works very well!
Mercedes Kulkarni
April 12, 2020
Hi! I’m halfway through my fold and turns, and it’s looking great. I want to make two smaller loaves instead of one big one. At what point do you recommend I divide the dough in half? Would it be after the bulk ferment stage?
Amanda Paa
April 12, 2020
Hi Mercedes!
I haven’t tried splitting this recipe because it’s a smaller loaf to begin with. But if you wanted to try that, you would split it after the bulk fermentation. So when you put the dough
on a floured surface to rest before shaping, split it in two. Then proceed to shaping and the final rise.
Cindy Mays
February 19, 2021
Hi Mercedes, I make two loaves each week and I have had excellent success. To answer your question if I may… what I do is, right after I mix the double ingredients I divide the dough in half and complete the mixing. This way there isn’t any interruptions for the binding that takes place. Nothing has bound together yet. Hope this helps. Cindy Mays.
Tatyana
April 2, 2021
Hi Amanda,
I purchased the sourdough starter from you but I didn’t use it right away. Does that matter? I fed it twice like your instructions said on the paper but it didn’t seem to rise.
Amanda Paa
April 22, 2021
Hello! You’ll need to go through the entire feeding instructions and feed it over the course of 4 days. It takes some time to activate, and should also be kept in a warm spot. You may find this video helpful.
Haley
April 10, 2020
Sourdough starter ordered! Your bread looks so good, Amanda! I’m going to deep dive into all of your posts and try to learn as much as I can. Question: How long can the starter be stored in the fridge? Like, should I be making bread every week to keep it going? Thanks for all the info!
Amanda Paa
April 12, 2020
Hi Haley!
The starter can be stored in the fridge for 7-10 days without baking. Feed it before putting into the refrigerator, and then when you want to bake, I suggest taking out the day prior and feeding it at least twice to make sure it is nice and active.
Shannon
April 12, 2020
Hi Amanda, it’s me Shannon from the Spicy Radish in Whitemouth, Canada. Your recipe is similar to the one I use and I have had success keeping my starter alive through extended bread baking hiatuses as long as 6 months at a time. With a few consecutive days of feedings, the starter comes back to liveliness and bakes up great loaves.
Amanda Paa
April 12, 2020
Hi Shannon! Such fond memories of cooking with you and picking vegetables together! You were one of the original reasons I became so interested in sourdough.
Hope you are well. And so good to know that even after that long of hiatus, your starter still comes back to life!
Wanda Rabdgaard
April 30, 2020
I am am so excited to order your starter and make sourdough for my gluten free husband.
Do you use bread flour with another flour ? ( i.e. spelt)
I am just clarifying.
Amanda Paa
May 1, 2020
Hi! So glad you’re going to start baking!
To feed the starter you’ll use unbleached all purpose flour.
For the bread recipe, you’ll use bread flour and other whole grain flour, like you mentioned – spelt.